A Guided Tour

How the dashboard works

Ten simple sections. Each one does one thing beautifully — so you can build a cinematic invitation without ever touching code.

Step 01

Theme

Choose your visual story

  • Browse a curated gallery of wedding themes — Mehrunisa Garden, Nikkah, Couple Drive, Emerald Garden, Coastal Bloom and more.
  • Hover any card to preview the animation, then tap to apply the theme instantly to the entire invitation.
  • The live preview on the right shows your changes the moment you switch themes.
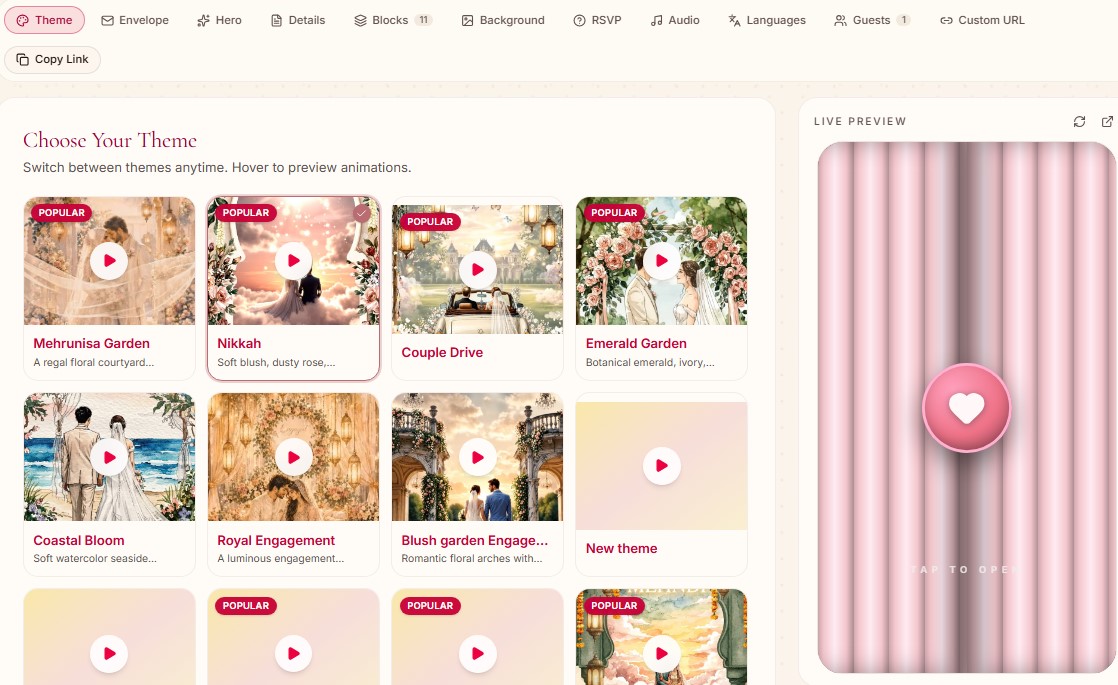
Theme dashboard section preview

Step 02

Envelope

Design the opening moment

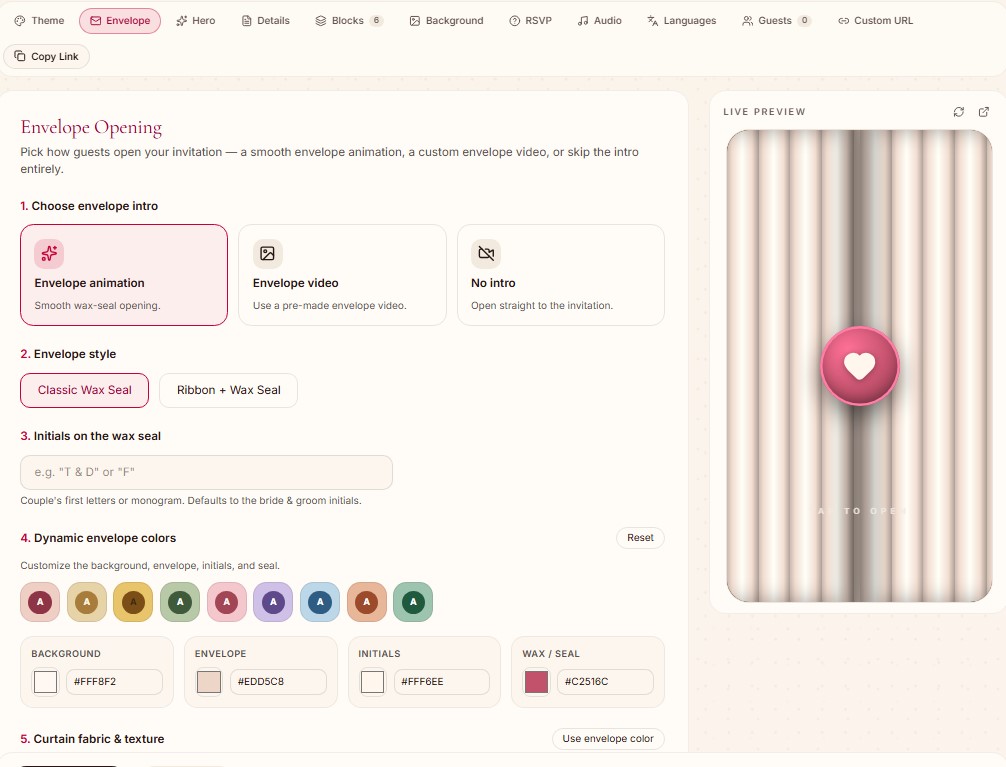
  • Pick how guests open your invitation: smooth wax-seal animation, custom envelope video, or no intro.
  • Choose envelope style (Classic Wax Seal or Ribbon + Wax Seal) and add your couple initials on the seal.
  • Fully customize background, envelope, initial and wax colors, plus curtain fabric and texture.
Envelope dashboard section preview

Step 03

Hero

The headline of your invitation

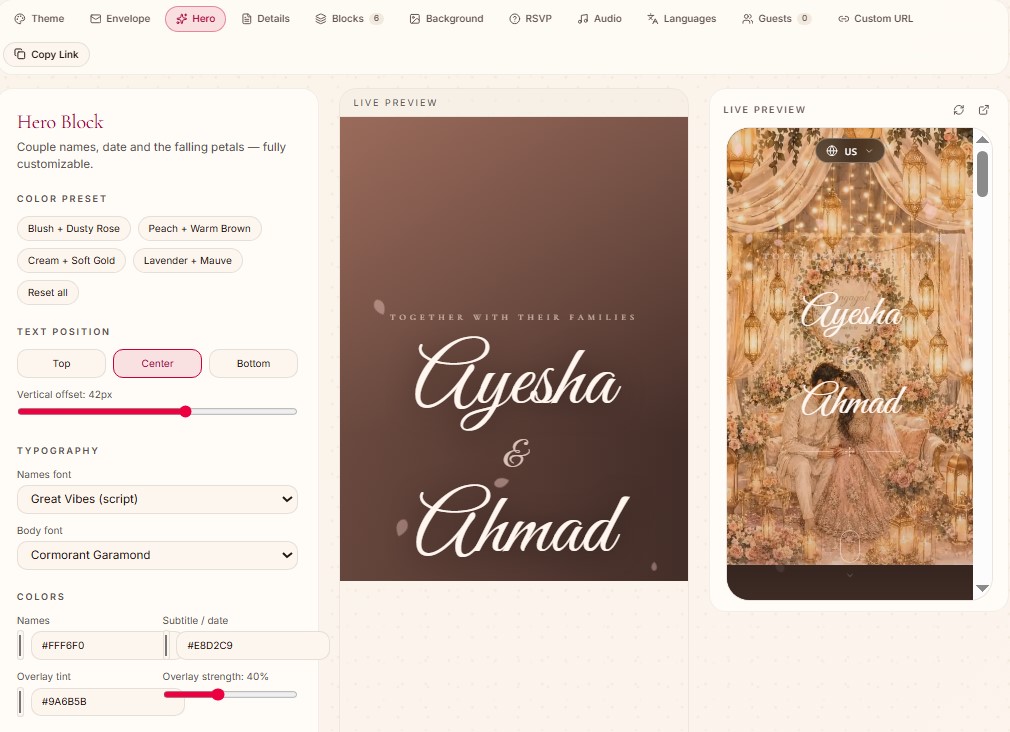
  • Set bride & groom names, the date line, and choose from elegant color presets like Blush + Dusty Rose or Cream + Soft Gold.
  • Control text position (Top / Center / Bottom) with a precise vertical offset slider.
  • Pick separate fonts for names and body text, and fine-tune overlay tint and strength for perfect readability.
Hero dashboard section preview

Step 04

Details

Couple & date essentials

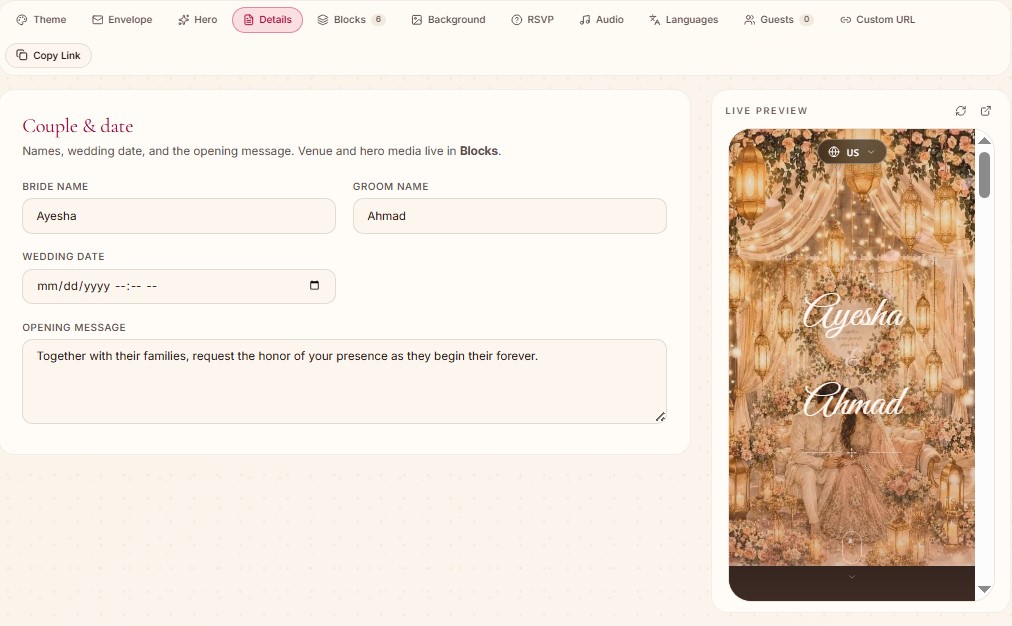
  • Enter the bride name, groom name and the wedding date in one clean form.
  • Write your opening message — the warm welcome line guests see when they open the invitation.
  • Venue and hero media live in the Blocks tab, keeping this screen focused and simple.
Details dashboard section preview

Step 05

Blocks

Add the sections that matter

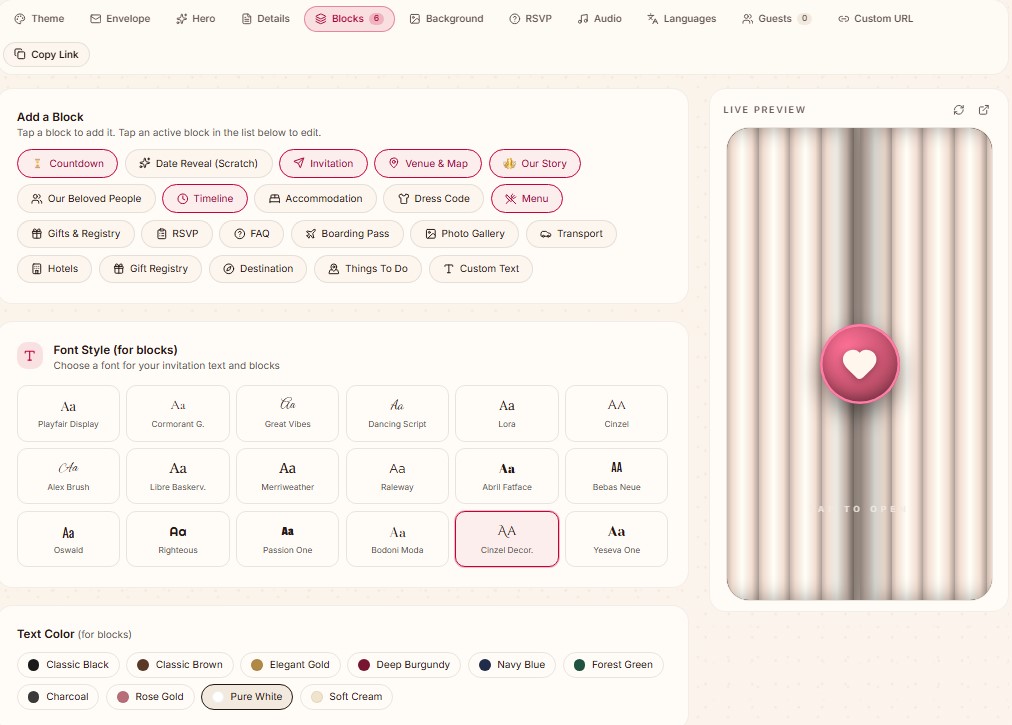
  • Tap to add blocks: Countdown, Date Reveal (Scratch), Invitation, Venue & Map, Our Story, Our Beloved People, Timeline, Accommodation, Dress Code, Menu, Gifts & Registry, RSVP, FAQ, Boarding Pass, Photo Gallery, Transport, Hotels, Destination, Things To Do and Custom Text.
  • Choose a font style just for blocks — from Playfair Display and Great Vibes to Bebas Neue and Cinzel Decorative.
  • Pick the text color for blocks from preset swatches like Classic Black, Elegant Gold, Deep Burgundy or Rose Gold.
Blocks dashboard section preview

Step 06

Background

Set the mood behind every block

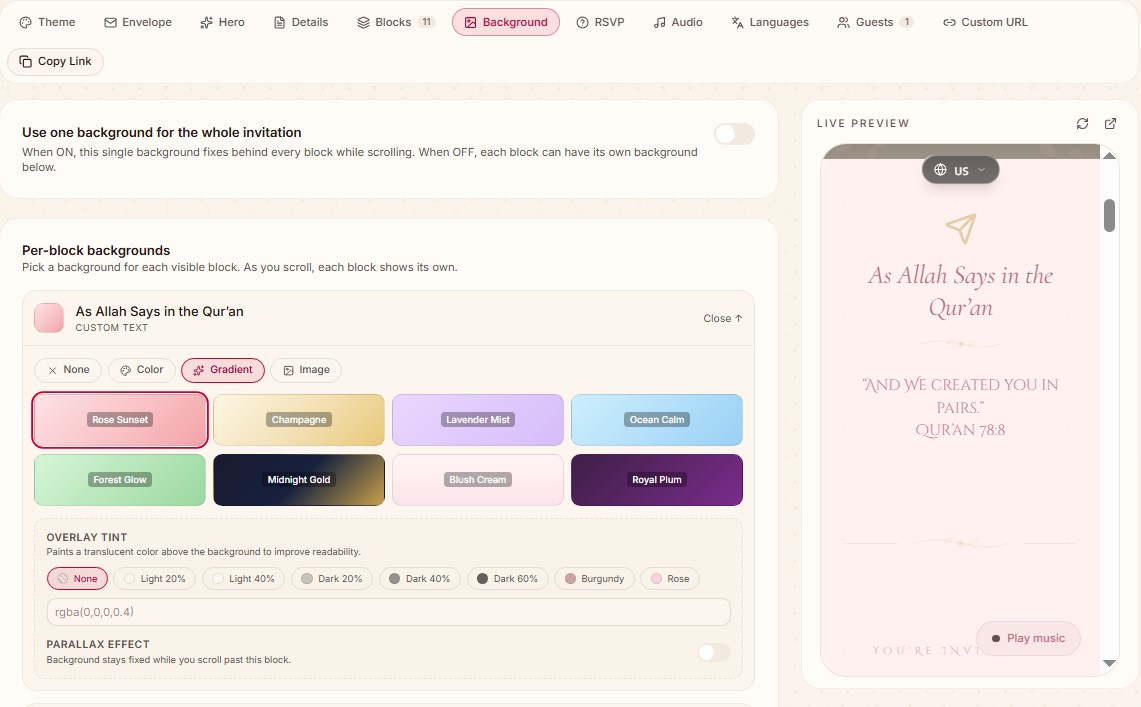
  • Use one background for the whole invitation, or give each block its own background.
  • Choose between None, solid Color, Gradient presets (Rose Sunset, Champagne, Lavender Mist, Ocean Calm, Royal Plum…) or your own Image.
  • Add overlay tints for readability and turn on Parallax to make the background stay fixed while guests scroll.
Background dashboard section preview

Step 07

RSVP

Decide what to ask your guests

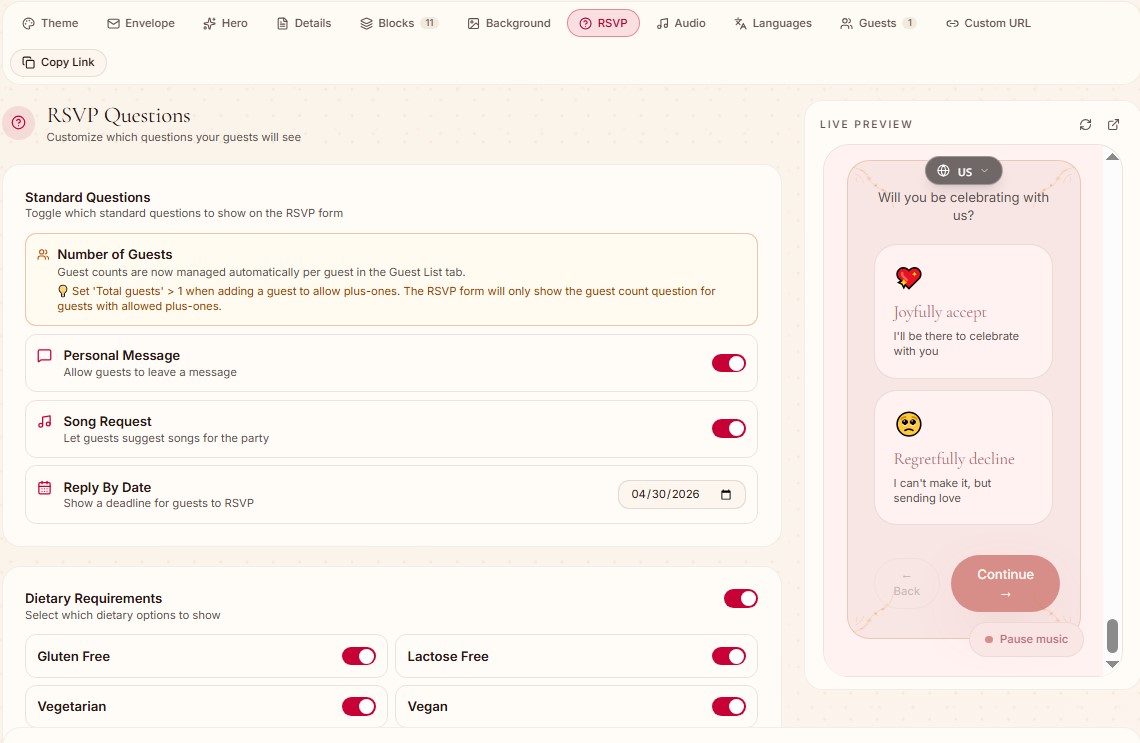
  • Toggle standard questions on/off: Personal Message, Song Request and a Reply By Date.
  • Guest counts are managed automatically per guest from the Guest List tab — plus-ones appear only for guests you allow.
  • Enable dietary requirements (Gluten Free, Lactose Free, Vegetarian, Vegan) so caterers get clean data.
RSVP dashboard section preview

Step 08

Audio

Set the soundtrack

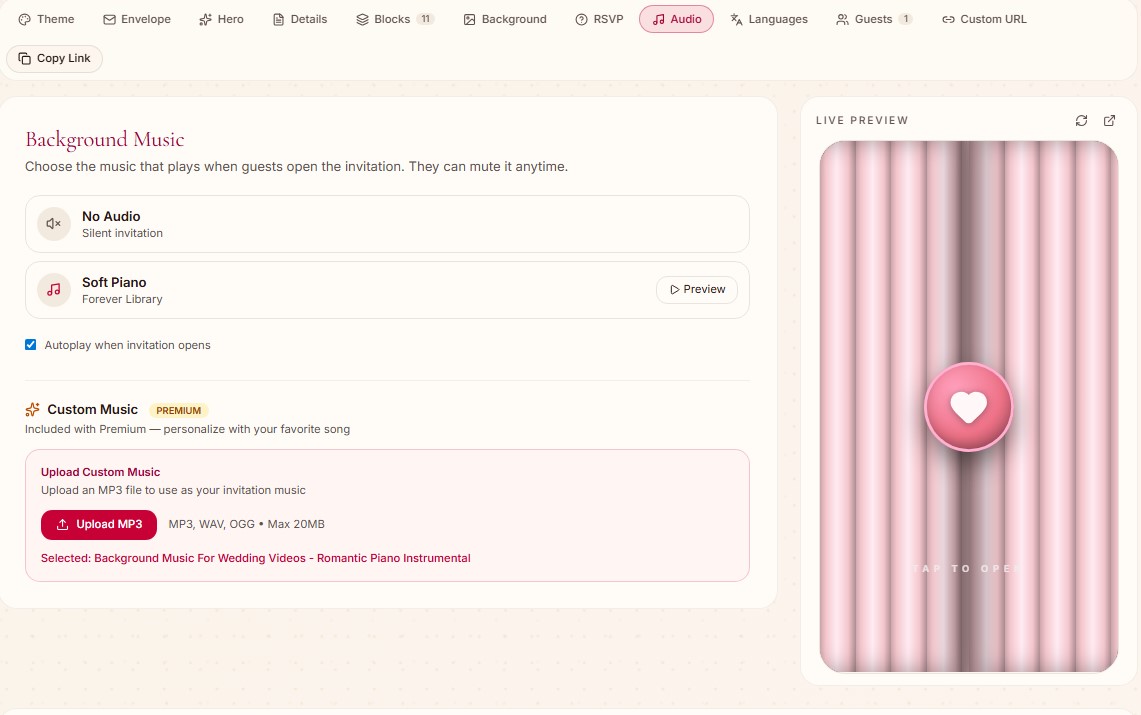
  • Pick the music that plays when guests open the invitation — they can mute it anytime.
  • Choose from the curated Forever Library (e.g. Soft Piano) or stay silent with No Audio.
  • Premium users can upload custom music (MP3 / WAV / OGG, up to 20 MB).
Audio dashboard section preview

Step 09

Languages

Speak to every guest

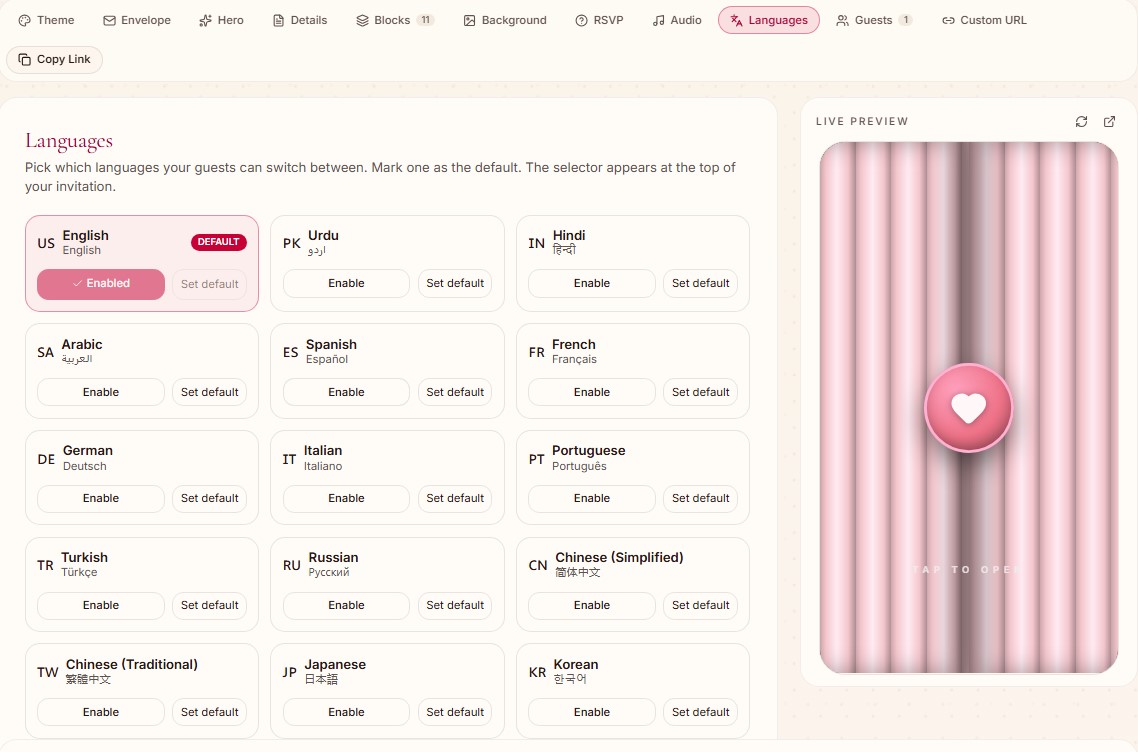
  • Pick which languages your guests can switch between — English, Urdu, Hindi, Arabic, Spanish, French, German, Italian, Portuguese, Turkish, Russian, Chinese, Japanese, Korean and more.
  • Mark one language as the default; the selector appears at the top of the invitation.
  • Enable/disable each language with a single click.
Languages dashboard section preview

Step 10

Guests

See who's coming, instantly

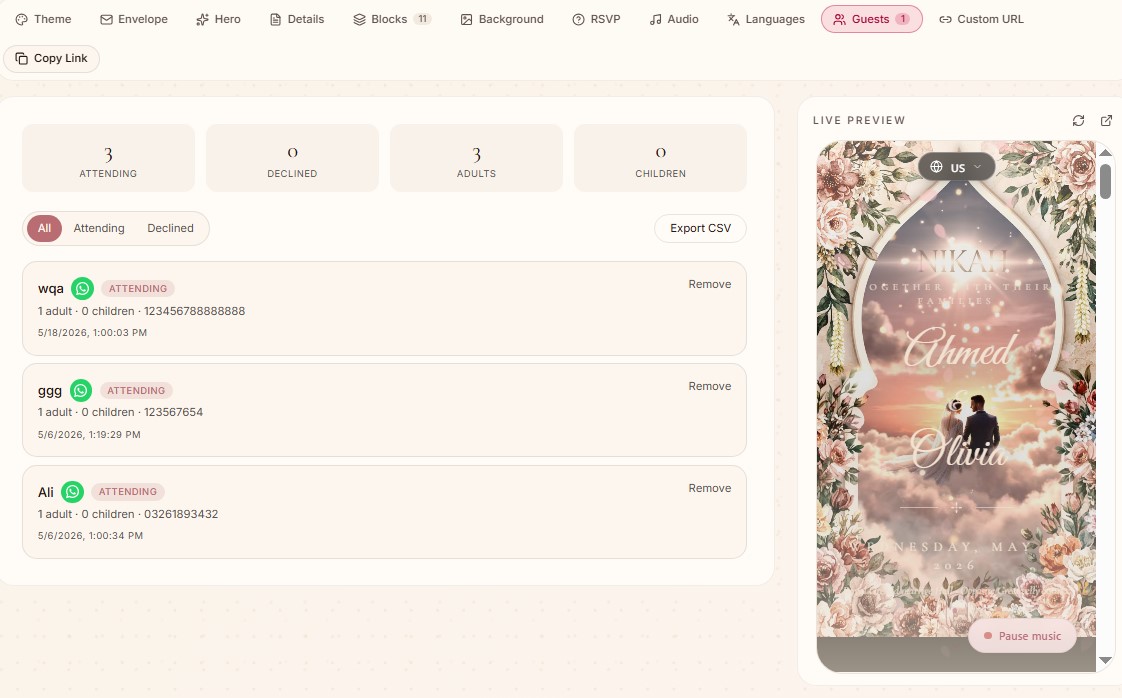
  • Live counters for Attending, Declined, Adults and Children at the top of the screen.
  • Filter by All / Attending / Declined and export the full guest list to CSV in one click.
  • Each entry shows guest name, adults, children, phone number, RSVP status and timestamp — with a quick WhatsApp shortcut and Remove action.
Guests dashboard section preview

Step 11

Custom URL

Your invitation, your link

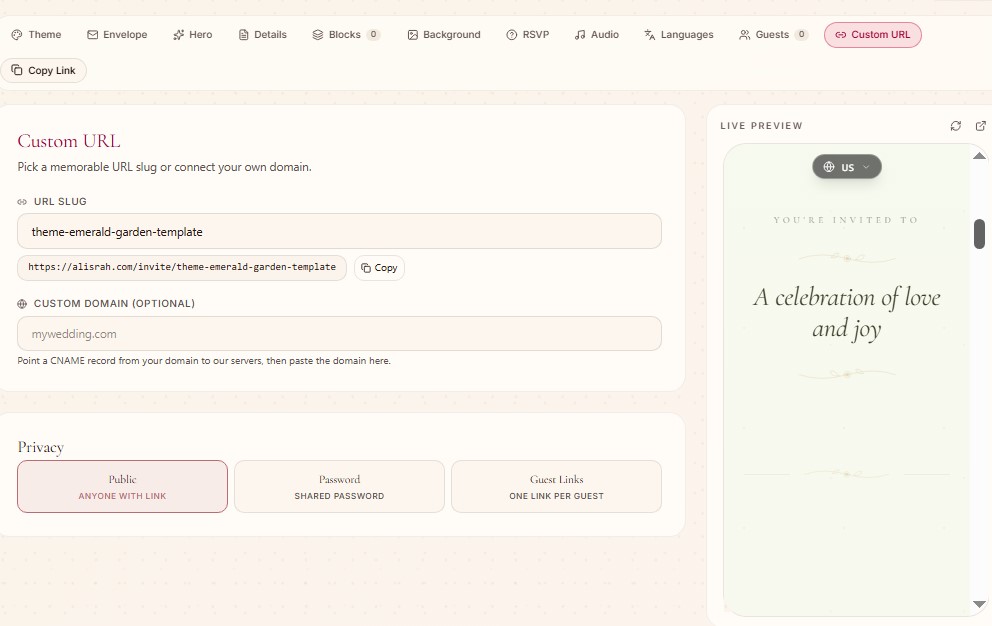
  • Pick a memorable URL slug — e.g. alisrah.com/invite/your-names — or connect your own custom domain via a CNAME record.
  • Control privacy with one click: Public (anyone with the link), Password (shared password), or Guest Links (one unique link per guest).
  • Live preview on the right updates as you type, so you see exactly what guests will land on.
Custom URL dashboard section preview

Step 12

QR Code & Sharing

Share it everywhere, instantly

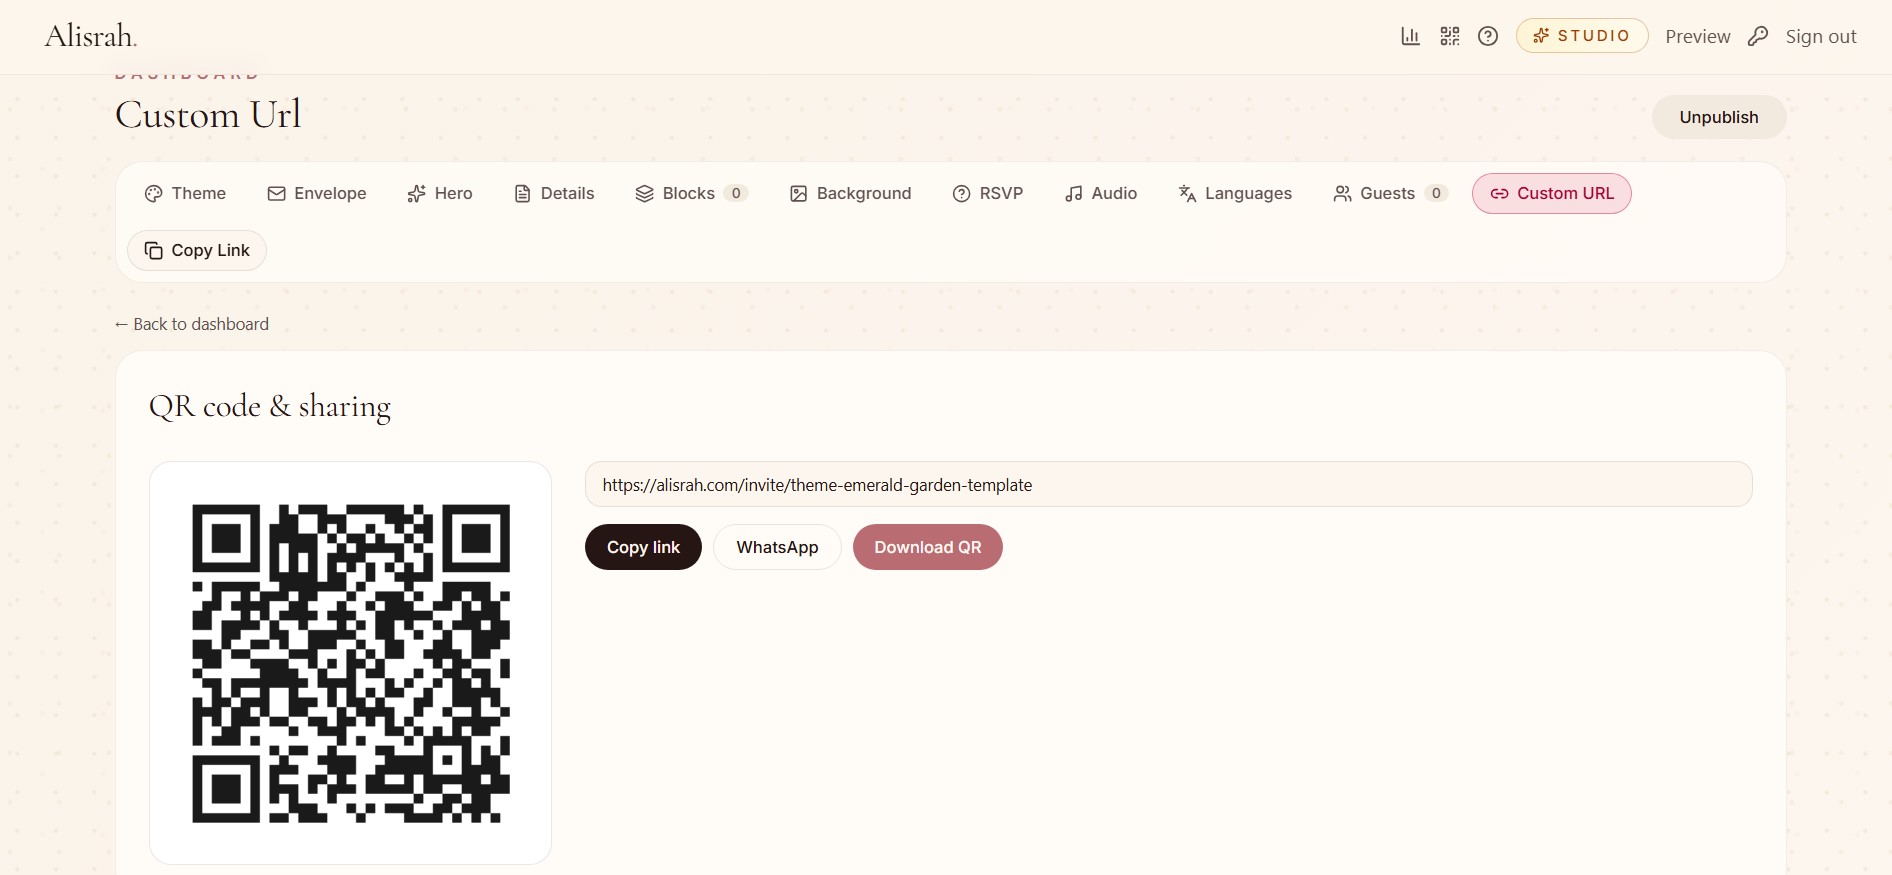
  • Auto-generated QR code for your invitation — perfect for save-the-date cards, mehndi favors and printed envelopes.
  • One-tap actions: Copy link, send directly on WhatsApp, or Download the high-resolution QR as an image.
  • Unpublish anytime from the top right if you need to take the invitation offline.
QR Code & Sharing dashboard section preview

Ready to make yours?

Every section you just saw is yours to customize. No designers. No developers. Just you and a beautiful canvas.

Create my invitation